08 June, 2020

Blender Add-on: The Shader Library [Version 1.06] - Sci-fi Gold, Brick and Clouds


In this video (scheduled for upload), we will be taking a look at the update for the Shader Library Version 1.06.

There are three new additions to the Library:

Sci-fi Gold 

Brick 
Clouds

I know some of you have been asking for some new additions to the Library for a little while and the two most requested was the Sci-fi Metal and Brick. 

I have only been working on them for a short time (hence they reason why they are not as polished as the rest). I have not had much time lately so they will be refined in the next version.


The Cloud Shader was created for the "Project Cloud" Stylized Sci-fi Planet Scene you can see here.


It was not something I planned on making for this add-on and it still needs a lot of work but I thought It would be a good idea to include it into this update. 

As like the other two shaders, I will clean up the process and the overall look in the next update and I hope you guys can forgive how basic they look.

That being said, they do a decent job and if you want to download version 1.06 you can find the script here.

If you guys have any suggestions on what you think we should add or change then feel free to let me know in the comments below. I will try to address them in a future version.

I hope you find this update helpful and as always thanks for reading!.

13 May, 2020

Blender Add-on: The Shader Library [Version 1.04] - Leather Shader


In this Video, we take a look at the new update for the Shader Library Version 1.04.

Download version 1.04 here.

In this update, I have implemented a suggestion that was to display the shaders color in the Viewport. This has no bearing on the Render but I think it a great suggestion since we can now easily see which object is using which shader. 

We also now have a Material Section. My aim is to fill this section with useful materials much like the new Addition, the Leather Shader. 

The Leather Shader is a procedural generated Material. So you don't need to download any images or worry about setting up the shader. Simply select the Color you want your Leather Material to be and the Shader Library will the work for you. 

You can tweak the Material and make any changes you want to really get varied (and better) results. 

If you have any suggestions on things you want to see implemented in the Shader Library, feel free to let us know in the comments below. 

I hope you find this update helpful. Stay safe, and thanks for reading!.

13 April, 2020

Blender Add-on: The Text Tool [Version 1.03]


In this video, I wanted to share with you the update for the Text Tool Add-on (v 1.03). You can download the updated Script here.

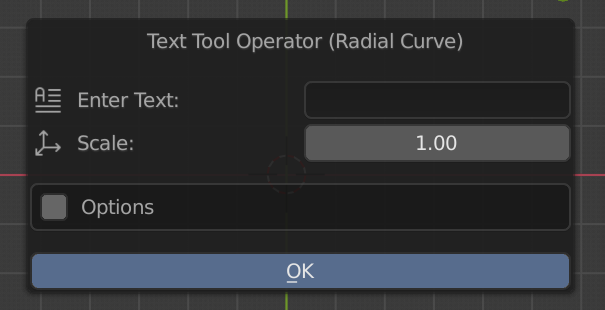
In this new version we have two new additions, The Radial Curve Tool and the Radial Border Tool. 


Radial Curve Tool

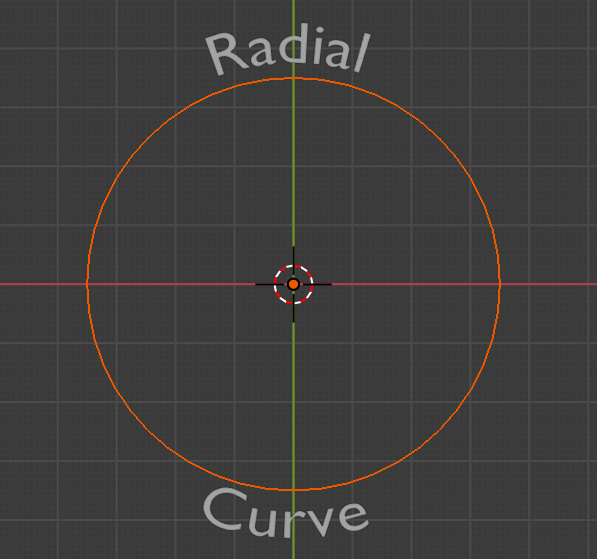
Just enter your text and the Radial Curve Tool will do all the work for you!.  You can set the Text Position to be wrapped around the top or the bottom.


By default the Bezier Curve is a Circle, though if you want you can enter edit mode and change the shape of your curve to fit your needs.


Radial Border Tool

The Radial Border Tool, will create a border based on the Selected Preset Style or you can Enter your own letter or character and create a Custom Radial Border.


These Features are not perfect and I have some Ideas already on how I want to improve it. That being said, I think it's a nice and quick way to add curved text or radial borders. If you have any suggestions be sure to let us know in the comments!.

I hope you find this update helpful!. As always, thanks for reading..

06 April, 2020

Blender Python Tutorial: Updated Registration Method - bpy


In this video, we will be taking a look at the updated Registration Method for our script(s) and add-ons. 

The updated or new way to register classes is much more convenient than it was before. 


 The "Old Way"

In order to register any new classes we have to copy and paste "bpy.utils.register_class()".

Then paste (or type) the name of our new Class. We then had to copy/paste it again for the Unregister.


 The "New Way"

We no longer have to copy and paste a whole bunch of stuff. 

When adding any new classes, we just simply add the class name,
in to the "classes" list (make sure you separate each class with a comma).
As far as I am aware, it has no bearing on performance. Meaning, you can still use the old way to register your classes and they will still work. This "new way", is far better for our workflow (especially when you are creating lots of Operators, Panels and so on).

You can modify your old scripts (as we did in the video). If you would like to use the template script and follow along, you can find the script here.

I thought it would also be helpful to upload just the new registration snippet. You can download the template snippet here and just past it into your new Scripts. Remember to add the names of your Classes to the "Classes" Variable.

I hope you find this video helpful and as always thanks for reading!..

30 March, 2020

Text Tool - Update (version 1.02) : Auto Italic and the Typewriter Effect

In this video, we will be taking a look at the update version 1.02 for the Text Tool Add-on. I have added an option called "Auto Italic", when adding text you can check the box and your text will be in Italic.

Download the Text Tool Add-on here.


The other addition I made was to add the "Animation" Section (though right now there is only one animation, I will be adding many more as we develop this add-on).

The Typewriter / Scrolling Text Effect is the first Animation in our arsenal, and I have done a tutorial on how to do this in blender in the past. With this add-on, it takes out the hassle of setting up your modifiers, converting your mesh and other minor Font Options.

I still have lot's of suggestions from you guys and I have not forgotten about them. I am working on a number of things. It takes time to implement everything. I hope you find this update helpful and as always, thanks for watching!.