
I created the Darkfall VFX Nodes Add-on, in hopes that it would help speed up our workflow for certain tasks.
With this Add-on you can create a variety of different effects and many of which can be modified.
To download the Add-on (version 1.8), click here.
Once you have downloaded the Add-on and installed it, you can access the Darkfall VFX Nodes from the Compositing Window.
I will be adding new effects, changing and updating this add-on as and when I can. If you guys have any suggestions for improvements or requests for new effects, then let us know!.

The Eye Color change requires a couple of Masks for this effect to work. Since the eyes are moving we also need to track the footage.
We can choose any color we want and we also have the option to brighten the whole eye.

(Eye Color Change Result)

The Sci fi Eyes Effect, will need an Image Texture for this to work.
You can download the one we used here, or you can use your own. As long as it has Alpha Transparency then you should be good to go!.
As we did in the effect above, we will need to track the eyes and
create an Eyelid Mask.

(Scifi Eye Result)


The Patch Node is one I use quite a lot, and if you have watched a recent Tutorial, "Rapids VFX" you may already know how to use this!.
We can add or "Patch" a movie clip over the top of another with this Node and has been used in many previous tutorials.

(Original Video)

("Patched" Rapids Result)


The Clone Node is another useful tool. We can define an area to be replaced with another section of our video, essentially cloning that area.
We only need one Mask for this effect to work.

(Original Video)

(Clone Node Result)

The Glitch Node

Add a Glitch Effect to your Videos.
Check out the Glitch Node here.

The Sketch Effect will take your video and apply a kind of "Sketched" effect. You can add a paper texture for more detail.
We have included a Paper Color preset Node that contains four different paper colors, or you can use the color wheel to select your own.
If your paper Image has color you can use that instead for a better result.

(Sketch Effect Result)


The Posterize Effect will take your video and apply a "Posterizing" effect. There are so many different variations you can get with playing around with the Values and the Blend Mode.
I have included a preset of three variations for you to select. You can modify each of them to get something that suits your needs.

(Posterize Option 1 Result)

(Posterize Option 2 Result)

(Posterize Option 3 Result)


(Original Video)

(Vignette Result)

Gradient Node

(Gradient)

Scan Line Generator
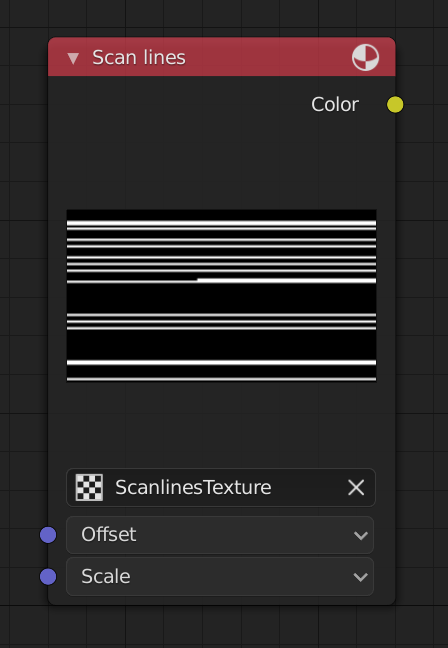
(Scan Lines)

Good work. I can see a lot of potential for the practical use. Keep up the good work.
ReplyDelete@Megawilsound, Thanks for saying so!..
ReplyDeleteBon travail et merci pour ton aide.
ReplyDeletepas de problème merci pour le commentaire
DeleteThank you John, I can not wait to test your addon!
ReplyDeleteHey Caza, I think you will like version 1.01 much better ;) I will be continually updating this Add-on and I hope you guys find it much improved..
DeleteAmazing! I will definitely try it!
ReplyDeleteHey Lucio, hope you find it useful!.. There will be a new update released each week on Monday, so be sure to check back on Monday for the updated version..
DeleteHi -- So I'm having a problem... I have Version 1.2 installed on Blender 2.8, but when I open any of the node items, it displays an empty box, and there is an error in the Python console. I've tried restarting Blender and reinstalling the addon, but nothing fixes the problem. Here's a screenshot of what I get:
ReplyDeletehttps://drive.google.com/open?id=1rrOqF9yotwqCKdyDnJqCdqKFy08CMClC
Let me know if there's a fix... I'd really like to be able to use this addon. Thanks.
Dave
@Dave, Hey thanks for the comment.. When I uploaded the addon, I realized there was an error "empty boxes and error code" just as you mentioned.. There was an error with a line of code but I fixed it and re uploaded the Add-on.. You must have downloaded the broken one.. Uninstall that add-on and download the script again.. Sorry for the inconvenience
DeleteI tried downloading and reinstalling again. The problem persists. Also, a file comparison showed that the new file I downloaded is identical to what I downloaded before.
DeleteHmm that's strange.. None else has had this trouble.. I see you are using 2.80 and on a windows which is the same as me, so nothing different there. So you downloaded the new version, uninstalled the previous version (if you had it) and then installed from file?.. Cam you try and remove it. Then go to the text editor window and press open, then open up the same .py script. Then you can click "Run Script" on the bottom menu or press the shortcut Alt P. Once you run the script change the window back to the compositor, check use nodes and then see if you get the same issue?.. If you want (and have it) you can join our facebook group> www.facebook.com/groups/darkfallblender
DeleteIt might be easier to talk.
Update: So, you may have deselected or removed the default cube?. Open a new file and keep the default cube selected and then the Panels will display correctly.
DeleteThanks -- Running the script from the text editor fixed the problem.
DeleteRunning the script from the text editor each time can be annoying. If you make sure you have an object selected in the 3d view it should work properly.. I hope to address this soon!..
DeleteThanks for the version 1.4. I no longer have to run the script manually! :) Thanks!
DeleteCongrats John you did a very incredible and nice job.
ReplyDeleteHey Thanks Alexandre!.. It still is a work in progress but I think it's coming along nicely ;)
DeleteHey Thanks for the comment Qbits!.. Glad you are enjoying it!..
ReplyDeleteI have read your blog and gathered useful information from your blog. Keep updating your blog. Waiting for your next update. Thank you
ReplyDeleteNode JS Online training
Node JS training in Hyderabad
Hi, thank you very much for the addon, it's very very good. I would like to know how I can do to restrict the effect to a range of frames. I tried it but I am not very skilled with the nodes and it seems that the effect is not restricted, I want to restrict it from frame 170 to 200 but the effect is still applied throughout the clip. Here I leave a capture. Thanks in advance. And excuse my English
ReplyDeletehttps://drive.google.com/file/d/1ylkC9XiZWqth8cCmMbSjBaXoSW82TpN5/view?usp=sharing
It's interesting that many of the bloggers to helped clarify a few things for me as well as giving.Most of ideas can be nice content.
ReplyDeleteThe people to give them a good shake to get your point and across the command.
PHP Training in Chennai | Certification | Online Training Course | Machine Learning Training in Chennai | Certification | Online Training Course | iOT Training in Chennai | Certification | Online Training Course | Blockchain Training in Chennai | Certification | Online Training Course | Open Stack Training in Chennai |
Certification | Online Training Course
Awesome!
ReplyDeleteThanks for sharing this informative blog with us. We were looking for this type of article from a few days. This is very helpful for me & for others who looking for iMovie pour Windows
ReplyDeleteThanks for sharing the valuable information. Keep sharing some more useful information on this topic. Visit the best multimedia & animation institute in Kolkata to learn more about animation, VFX, and graphic designing.
ReplyDeleteThank you for sharing this type of information. We hope you will share some more information about it. This is very helpful for me & for other who looking for iMovie for laptop Windows. Visit our site & download it.
ReplyDeleteI've downloaded and installed your add-on. But I can't find it in the Compositor. The nodes aren't added to the "Add" menu. They also don't show up when I search for them (Blender 2.90.1).
ReplyDeleteHey @Stingray So first off, the nodes are not in the Add Menu (shift A).
DeleteTo access the Nodes you need to either use the Panel (N) then go to the VFX Node Tab or you can use the Menu (ctrl A)
If this does not work, it could be a compatibility issue. I most likely need to make some changes to the code to update it for 2.90
Great stuff. My only nitpick is the fact that it isn't blended (ah) with the "Shift+A" command.
ReplyDeleteThat would make it, IMHO, absolutely perfect.
This is very good blender
ReplyDeleteThank you for your valuable information.
ReplyDeleteVideo effects download
Excellent post. Thank you very much. Improve your career in Latest AI technology course in Coimbatore, please visit
ReplyDeleteNice blog I really like this blog. Data visualization and reporting services in Dubai
ReplyDeleteI truly appreciate how your writing goes beyond the surface and dives deep into the topic. This post was not only informative but also actionable, with tips that I feel confident using to improve my workflow. Code++, Software Training Institute in Coimbatore
ReplyDeletewhenever you feel confused, use this coin flip online tool
ReplyDelete