In this video, we will be taking a look at not only creating a Shader Material but also assigning that material to the currently selected object.
We can create something simple or something complex but both ways will be using an Operator. We first create a panel where our button will live. Then we can create a simple operator, that when pressed will create and assign a Shader Material to the Selected Object.
If you want the user to have any options, we can easily upgrade the simple operator and make it become a popup dialog box. We can then giver the user control over any setting or option. In this example we want the user to be able to set the color before adding the Shader.
We have covered popup dialog boxes in other posts and videos so be sure to check them out!. Though in this example we will be taking a look at the FloatVectorProperty.
In code that would be:
The Float Vector Property usually looks like this:
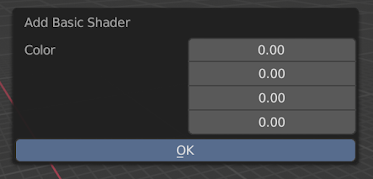
If we tried to use this in it's current state, it would kick up an error because as we know to change a Color Value we actually need four values. We need the Red, Green, Blue and Alpha Values.
We can just define the Size and set it to 4 to add another value:
We can just define the Size and set it to 4 to add another value:
Which would look like this:
Now we have this, it doesn't look great. In fact it looks terrible, we want the user to have a good and quick experience.
So let's change this FloatVector slightly by defining the Sub type.
And that would turn the Float vector into something much more appealing:
If you want to set the default color (here you can see I set the default to green), you just need to define the default like so:
If you want to download the template script you can download the script here.
I hope you found this video helpful and as always thanks for reading!.


