
In this Video, we will be taking a look at Particles and how we can make them follow a path we define.
As many of you know by know (and are probably sick of hearing about), I am creating a 2D Game and in which, I needed to create some kind of visual of sending a mass of troops from one place to another. You can check out the Throne Game here.
Creating a Particle System to fit my need was a pretty easy task with Blender.

We can start by aligning the Camera. First we need to jump to the Front View by pressing num-pad 1. Then Hold ctrl alt and num-pad 0.
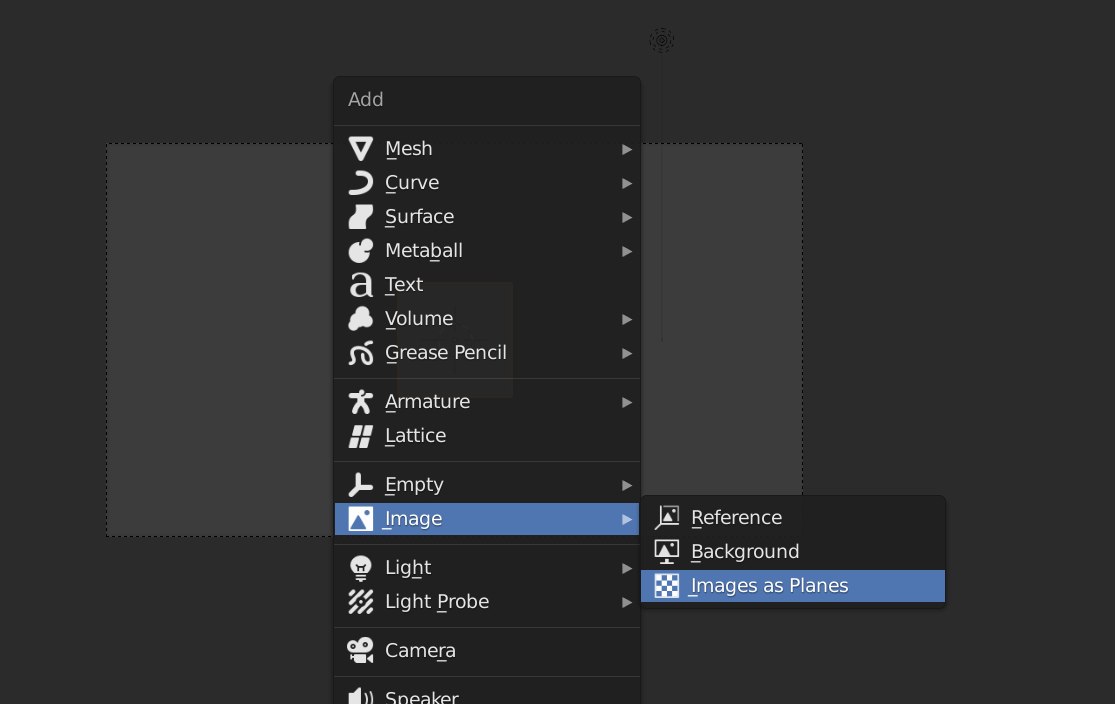
Then using the Image as Planes Add-on (that comes built-in) we can add our map or background image.
If you do not see the "Image As Planes" option, you just need to activate the Add-on.
Go to Edit > Preferences > Add-ons > Search for Image As Planes and Activate the Add-on.


Patreon Subscribers can download the Map .blend file or the other Files here.
Once we have our map in place we need a few more things. Unlike about 99.9% of my tutorials we are actually going to USE the Default Cube!. By changing the Shader Color and Type, the Default Cube becomes the object that will be emitted in the Particle System.
Talking of which, we will need an object for the Particle System, let's add another Cube (the Default Cube is on fire today) and use that for the Particle Emitter. We do need to make some changes such as setting the Start and End, The Lifetime of the Particles and more!. Keep in mind these values will always change depending on your scene.
I wanted a clump of men (or Default Cubes I guess), to suddenly appear and march off to their destination. Though we can get many different variations depending on what effect we are looking for.
We will also need a Curve which will be our "Path" for the Particles to follow. You can use a Bezier Curve if you want but I prefer to add a plane. With the Plane, delete all but one Vert.

There is an easier way to get a single Vertex and to do that you just need to activate another built-in add-on called Extra Objects.

Shift+A > Mesh > Single Vert. Not only will it add a Single Vertex but it place you inside Edit mode also.
With our Single Vert we can now extrude a path going from one place to another. When we are happy with the Path we just need to convert it to a Curve and we can head over to the Physics Properties Tab.

By adding a Force-field Physics Property and playing around with a couple of settings we can easily get the effect I was aiming for.
Again, you can go crazy and play around with the values to get lots of interesting Variations.
Then when we are happy with it we can bake and Render. You can choose to Render it out as an Image sequence or as a Video.
I hope you found this video helpful and as always thanks for reading!.
ReplyDeleteHi.
Thank for sharing this information, this blog good and it’s gies good information about How to Make Particles Follow a Path and its concepts thanks for sharing this blog with us.
Here is sharing some KOFAX information may be its helpful to you.
KOFAX A COMPLETE GUIDE
ReplyDeleteHii
Thank you for the informative article. Play the animation to see how the particles follow the path. Make any necessary adjustments to the path or particle system settings to achieve the desired result. Here is sharing some Java Certification Course information may be its helpful to you.
Java Certification Course